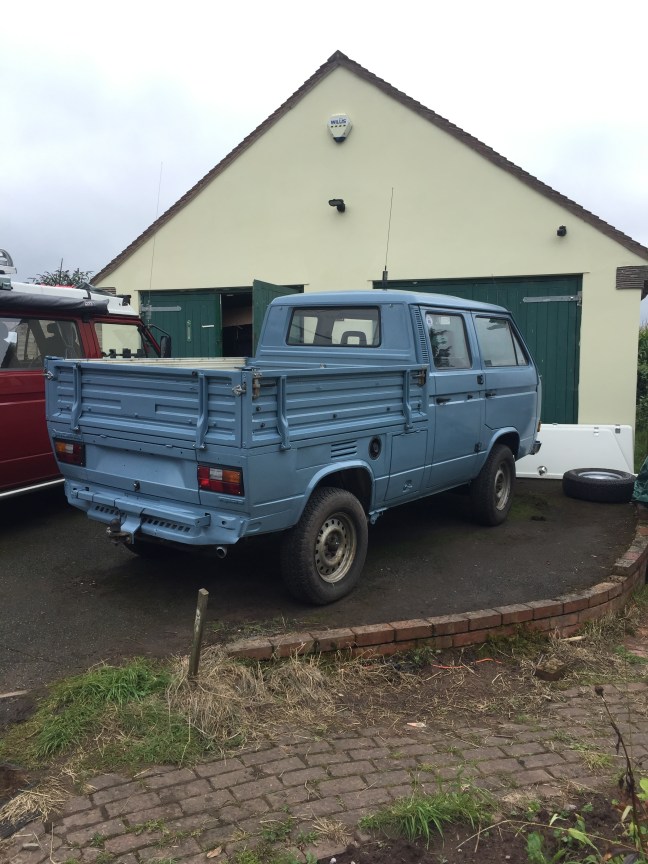
Of course I love our old double cab pick up truck Loki very much, but you couldn’t help notice he was looking a little jaded and in need of some attention. The previous owner had roughly painted him over in silver Hammerite paint, which for those who don’t know is the stuff of hell itself. It is hard, awful stuff with a hammered finish. The original white showed through and several areas of surface rust had been treated with a rust converter which looked terrible.


So, after a lot of reading and watching YouTube videos, I decided that maybe the Rustoleum roller painting method might just be what the doctor ordered. Rustoleum is a paint designed to be applied to either bare metal, or even over rust and is flexible and UV stable. Specifically, Rustoleum Combi-Color is the paint of choice, available in RAL colours in either 1ltr, 2.5ltr can or 500ml aerosols. 2.5 ltrs is enough for one coat of paint on a VW van along with some aerosols to get into those hard to reach places.

Of course the hardest part of any paint job is the preparation. To start with I decided to remove all the door seals, wipers, grills and windows, except the windscreen. I also elected to swap the rusty passenger door for a good condition replacement. I decided I’d replace all rusty nuts and bolts I encountered, missing hole blanks and other bits and bobs. And then the rubbing back began.
We started out with 60 and 80 grit wet and dry either by hand or using a detail sander and a random orbital sander. Both power tools gave up their lives in the next six days… RIP power tools. Whilst sanding I used an angle grinder with a flap disc to tidy up some rough welds along the way and applied small touches of filler where needed. Doors and hatches are much easier if you remove them and sand them on a bench (garden table).


Once sanded, any remaining corrosion was taken to bare metal and treated with a rust converter called Neutrarust. It’s a water based treatment that makes a hard coating, impermeable to water and is widely used by the armed forces and by the oil industry. Several nasty areas were highlighted, particularly the cab door steps, but thankfully they seem to have been caught in good time. There was one small hole above the jacking point which will need welding before winter. It’s still strong and the jacking point already replaced, so hopefully this will be fine with a small patch.
Oh, oh…

Anyway, on with the preparation. Any areas you don’t want painting, need masking and quality masking tape will pay dividends… I used cheap stuff and wished I hadn’t. I masked the windscreen rubber, but will replace the rubber when I apply the second coat. The process for applying the paint involves roller painting using a quality foam gloss paint roller. Again, don’t skimp on quality as I had cheap ones which fell apart after just a few minutes. The paint needs to be thinned to around 20% using white spirit (4:1). If you’re painting on a hot day, you might want to thin the paint even further. Pick a day that’s dry and not too windy to keep the bugs off, but also not too hot or the paint won’t have time to self level before drying. It’s also useful to have a critically-eyed friend close by to watch for drips and runs, but don’t be tempted to over work the paint once it’s started to dry. Work quickly and methodically, with long overlapping roller strokes. Expect to apply a couple of thin coats rather than slopping on thick coats for a much better finish.


If you make a mistake, leave it be and come back later to rub it back and paint over. The roof initially looked awful, but after waiting around eight hours (minimum time between coats) a second thin coat brought it back to the required standard.
Before shot, the paint goes on evenly but not always as planned…. After shot shows how it should be.


Once you get the hang of it, you will make rapid progress. I would say that as a minimum you will need to make at least two coats to get an even finish. According to the experts (and I’m certainly not expert), if you then rub back with 2000 grit wet and dry used wet, then apply up to two more coats, then you’ll get an amazing finish…. I’ll let you know how that goes, but I think it’s looking pretty good already.


The eagle eyed amongst you might note that one of the headlamps is missing a lens… it fell onto the ground and smashed during the night. Dunno why as we didn’t touch it. Be prepared for the unexpected I suppose. There’s still a lot of parts to refit and many door seals, plus I intend to paint the interior panels and replace the headlining which I had to cut to remove a broken aerial connection. Windows are easy to refit using a plastic coated washing line and a lubricant like KY jelly (snigger…) Do not use washing up liquid though as it contains salt.
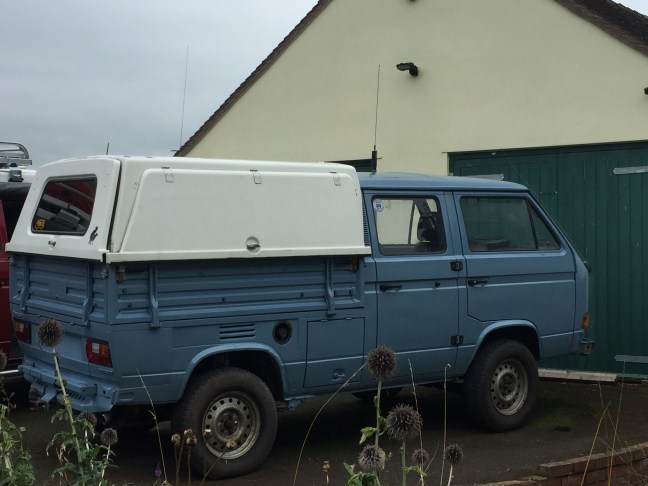
So far I’m very happy and the result is such an improvement on the original messy look. In around a month when the paint has fully hardened and time / weather permits, I will flat the paint back and apply a second coat and maybe even a third thinner coat. I’ll update the blog with the result. The load bed will eventually be painted with Raptor bed liner paint.
Any suggestions for a contrasting colour for the Vindic load bed canopy?
I think he looks great! Get some paint and get painting!
